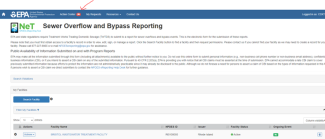
RIPDES Electronic Reporting: NETSEWEROVERFLOW
Rev. 11/16/23
This page contains instructions for Frequently Asked Questions for the electronic reporting system NETSEWEROVERFLOW.
- A. Signatory Role is not hyperlinked
- B. How to change your CDX Email Address
- C. How to Update Security Questions for a Signatory in CDX
- D. How to Access and Open the NETSEWEROVERFLOW Program Service
- E. Wrong CDX Role for NETSEWEROVERFLOW User who needs to Sign forms
- F. How to grant facility permissions for other users in NETSEWEROVERFLOW (user has manage permission)
- G. How to remove facility permissions for other users in NETSEWEROVERFLOW (user has manage permission)
- H. How to add/revoke facility permissions for self in NETSEWEROVERFLOW (user has manage permission)
- I. How to request/remove facility permissions for self in NETSEWEROVERFLOW (user has some permissions but does not have manage permission)
- J. How to grant pending access request to a Facility in NETSEWEROVERFLOW via Action Center (user has manage permission)
- K. How to grant pending access request to a Facility in NETSEWEROVERFLOW via Actions button (user has manage permission)
- L. How to Flag a Draft Report via the Actions Button
- M. Actions Available for Flagged Forms/Unflagging Forms from the Actions Button
- N. How to Certify a Draft Report via Action Center
- O. How to Certify a Draft Report via Actions Button
- P. How to Delete a Draft or Flagged Draft that was created in error
- Q. How to Open and Print Reports and/or related attachments in NETSEWEROVERFLOW
- R. How to search and export all violations generated for your Facility in NETSEWEROVERFLOW
- S. How to View NETSEWEROVERFLOW Reports in ECHO
A. Signatory Role is not hyperlinked
This occurs when the user fails to complete signing the Electronic Subscriber Agreement (ESA) and the system routes it to a paper submission for completion. A failed ESA can happen because you either failed identity proofing (LexisNexis) and were automatically routed to paper, you did not complete the process, or you declined identity proofing through LexisNexis and chose to mail the ESA.
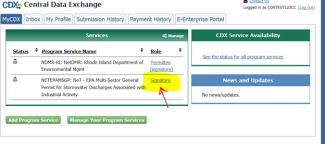
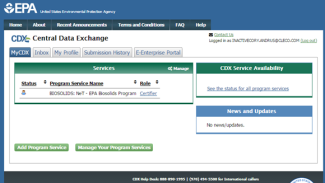
- Sign in to your CDX account to open the MyCDX page
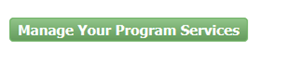
- Click the “Manage Your Program Services” button:
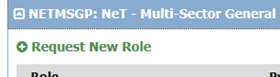
- Click “NETSEWEROVERFLOW: NeT – Multi-Sector General Permit…”
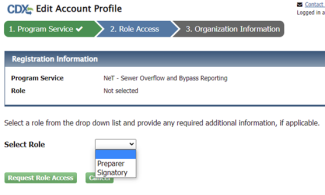
- Click “Request New Role”
- Select the Signatory role from the “Select a Role” drop down
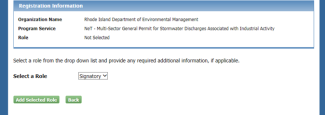
- Enter your Job Title
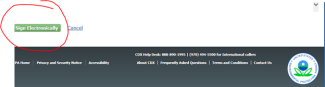
- Scroll to the bottom of the “Electronic CDX Electronic Signature Agreement” page and click “Sign Electronically”
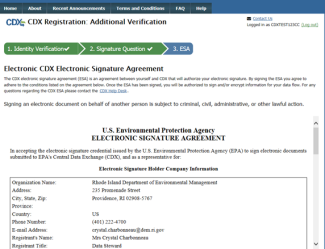
- Accept the Terms and Conditions
- On the eSignature widget: Enter their password, click “Login”
- On the eSignature widget: Enter the response to your security question, click “Answer”
- On the eSignature widget: Click “Sign”
- Navigate back to the MyCDX page and you will see an active (hyperlinked) Signatory role for NETSEWEROVERFLOW.
- Sign into your CDX account and click on the “Inbox” tab
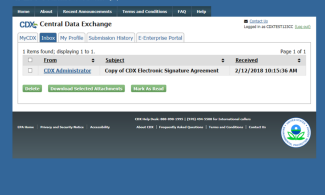
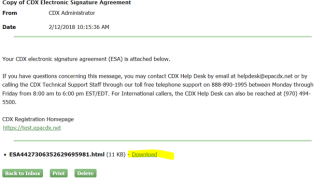
- Select the Email with subject line “Copy of CDX Electronic Signature Agreement”
- Click download, and then print it out. Mail as instructed on the document. Mail tracking service is recommended.
B. How to change your CDX Email Address
(adapted)
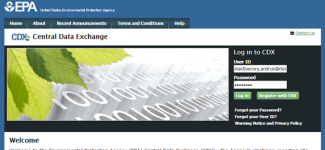
- Step 1. Log in to https://cdx.epa.gov
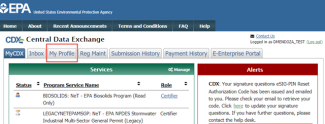
- Step 2. Go to the My Profile tab
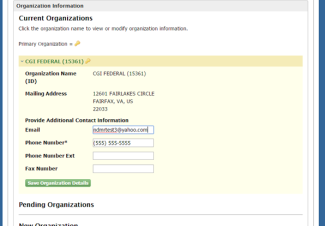
- Step 3. Click Modify Organization Information
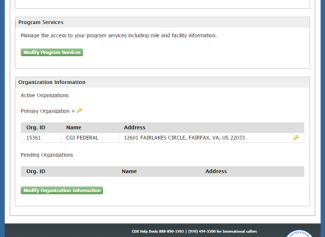
- Step 4. In CDX email addresses are associated with organizations, click on the name of the organization for which you would like to update email address.
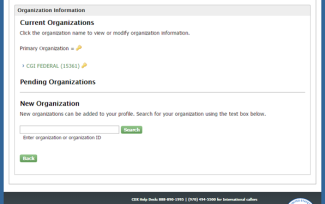
- Step 5. Enter the updated Email address and click Save Organization Details
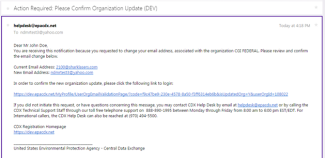
- Step 6. An email confirmation message will be sent to your new inbox, to complete the change, click on the link in this email.
C. How to Update Security Questions for a Signatory in CDX
(adapted from https://usepa.servicenowservices.com/oeca_icis?id=kb_article&sys_id=1a25a4181b2e6d548e946311f54bcbaf)
- 1. Access your CDX account at https://cdx.epa.gov.
- 2. Once you have accessed your CDX account, click on the My Profile tab.
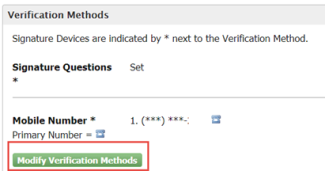
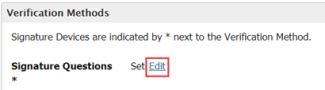
- 3. Locate and click the "Modify Verification Methods" button in the Verification Methods box.
- 4. In the Verification Methods section, click the blue "Edit" link.
- 5. Enter your CDX password in the open field and click "Send" button.

- 6. You will see a notice on the page indicating an "Authorization code sent for updating CROMERR Signature Questions".
- 7. Completing the above actions will invoke an email to be sent to your email account on record with an authorization code for use in resetting the questions.
- 8.In your CDX account, click on your MyCDX tab at the top of the page.
- 9.On your MyCDX page, you will see an Alert on the right hand side of the page regarding your eSIG-Pin Signature Questions.

- 10. Click on the word "here" within the Alert message (it is a blue link).
- 11. This action will take you to another page where you will see a blank field. You will now be required to access your email account and locate an email message from helpdesk@epacdx.net.
- 12. Open the email where you will find a long code within the email. Highlight and copy this code.
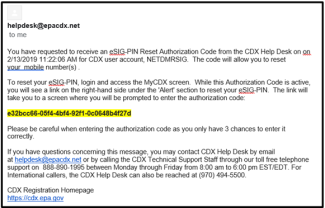
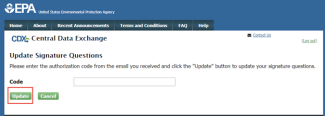
- 13. You will then paste the authorization code from the email into the open field on the CDX account page.
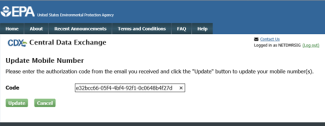
- 14. Once you have completed this action, click the "Update" button.
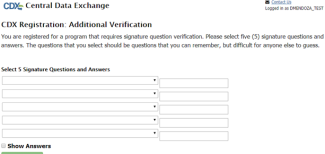
- 15.You will now be prompted to select 5 security questions and provide 5 answers. Note: The answers you enter are case, space and character sensitive within the system. To view the answers, mark the Show Answers checkbox.
- 16. Once you have completed the entries, click the "Save Answers" button.
- 17. You will now be taken back to your MyCDX page.
D. How to Access and Open the NETSEWEROVERFLOW Program Service
- 1. Login to your CDX account
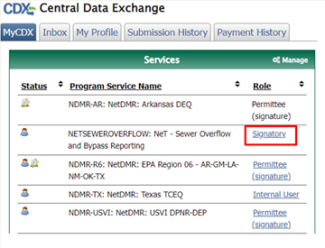
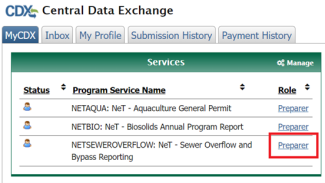
- 2. Click on your active role (i.e. - Signatory or Preparer) to open the program service:
- If you see the program service name listed but your role is not hyperlinked, you did not complete the process and will need to manage your program services (see FAQ: Signatory Role is not hyperlinked)
- If you do not see the program service name listed, then you do not have the NETSEWEROVERFLOW program service and will need to add it (see file below)
E. Wrong CDX Role for NETSEWEROVERFLOW User who needs to Sign reports
A user who has a Preparer role will not be able to sign and submit any documents drafted on the NETSEWEROVERFLOW application. If the user meets 40 CFR 122.22 and needs to sign documents in NETSEWEROVERFLOW, they will need to follow the steps below to correct this:
- 1. Login to your CDX account
- 2. Click the “manage program services” button:
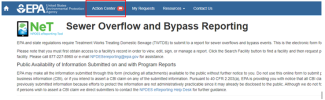
- 3. Find and click NETSEWEROVERFLOW: Net – Sewer Overflow and Bypass Reporting
- 4. Click “Deactivate” under the status column:

- 5. Click “Request new role”:

- 6. Select “Signatory” and then click “add selected role”:
- 7. Scroll to the bottom of the “Electronic CDX Electronic Signature Agreement” page and click “Sign Electronically”

- 8. Accept the Terms and Conditions
- 9. On the eSignature widget: Enter their password, click “Login”
- 10. On the eSignature widget: Enter the response to your security question, click “Answer”
- 11. On the eSignature widget: Click “Sign”
- 12. Navigate back to the MyCDX page and you will now see an active (hyperlinked) Signatory role for NETSEWEROVERFLOW.

F. How to grant facility permissions for other users in NETSEWEROVERFLOW (user has manage permission)
- 1. Sign in to your CDX account and click on your role (i.e. – Signatory) for the NETSEWEROVERFLOW program service to navigate to the NETSEWEROVERFLOW Homepage
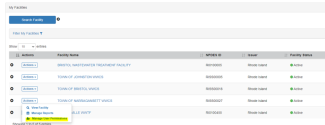
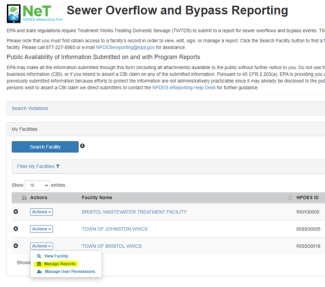
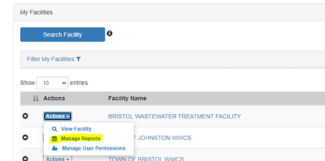
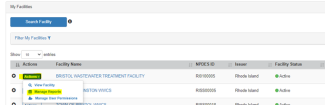
- 2. Find your facility in the “My Facilities” list on your NETSEWEROVERFLOW Homepage
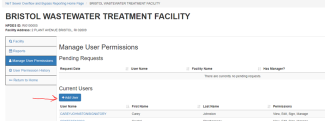
- 3. Select the “Actions” button and then click “Manage User Permissions” from the drop down menu.

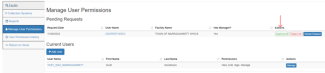
- 4. On the next screen, select the blue “Add User” button under the current users section.
- 5. A pop-up will appear requesting that you search for the person’s e-mail to see if they have a CDX account. Click “Search”
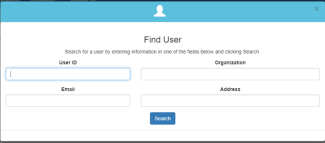
- 6. If you can’t find the user, you can search again, or you can notify the user to Create their own CDX account to access the NETSEWEROVERFLOW (file below) Program Service
- 7. If you can find the user, click the blue “Select” button in the Action column,
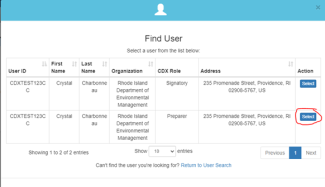
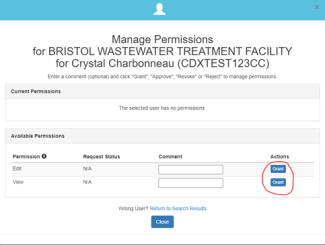
- 8. Then click the blue “Grant” button for each role you want to give access to that user. Click Close when you are done. The user will now see the facility when they login to their account and open the NETSEWEROVERFLOW Program Service.
G. How to remove facility permissions for other users in NETSEWEROVERFLOW (user has manage permission)
- 1. Sign in to your CDX account and click on your role (i.e. – Signatory) for the NETSEWEROVERFLOW program service to navigate to the NETSEWEROVERFLOW Homepage
- 2. Find your facility in the “My Facilities” list on your NETSEWEROVERFLOW Homepage
- 3. Select the “Actions” button and then click “Manage User Permissions” from the drop down menu.

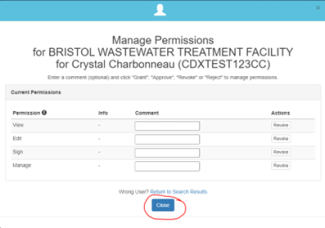
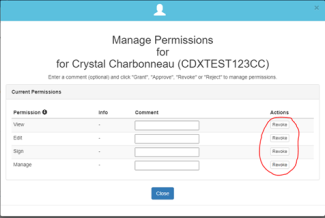
- 4. On the next screen, select the blue “Manage” button under the Actions column for the current user you would like to remove.
- 5. Select the “Revoke” button next to the permission(s) you would like to remove for that user, and click Close when finished. The user will no longer see the facility in the NETSEWEROVERFLOW Homepage if all permissions are revoked.
H. How to add/revoke facility permissions for self in NETSEWEROVERFLOW (user has manage permission)
- 1. Sign in to your CDX account and click on your role for the NETSEWEROVERFLOW program service to navigate to the NETSEWEROVERFLOW Homepage
- 2. Find your facility in the “My Facilities” list on your NETSEWEROVERFLOW Homepage
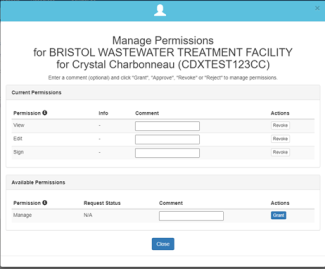
- 3. Select the profile button on the far right of the screen to manage your permissions to that facility:

- 4. Select the “grant” button next to the permission you would like to add, or “revoke” next to the permission you would like to revoke, and click Close when you are done.
I. How to request/remove facility permissions for self in NETSEWEROVERFLOW (user has some permissions but does not have manage permission)
- 1. Sign in to your CDX account and click on your role for the NETSEWEROVERFLOW program service to navigate to the NETSEWEROVERFLOW Homepage
- 2. If you see your facility in the “My Facilities” list on your NETSEWEROVERFLOW Homepage, but you do not have all of the permissions needed, click the icon located under the permissions column for that facility

- 3. On the pop-up screen, select the Request button next to all of the permissions you want to request that you do not already have. Then select Return when you have finished.
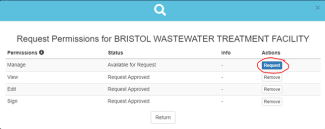
- 4. You will receive an email notification when this has been completed. Note: if the facility does not have anyone with the manage permission, RIDEM must approve your request. If there is a manager for the facility, they will need to approve your request.
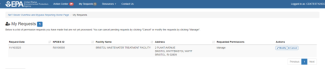
Your pending request will be viewable on the My Requests Tab until it is either approved by the manager or by RIDEM:
J. How to grant pending access request to a Facility in NETSEWEROVERFLOW via Action Center (user has manage permission)
- 1. Sign in to your CDX account and click on your Role for the NETSEWEROVERFLOW program service to get to the NETSEWEROVERFLOW Homepage (if you do not have the NETSEWEROVERFLOW program service, add it: see How to Add the NETSEWEROVERFLOW Program Service to an existing CDX account

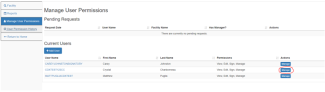
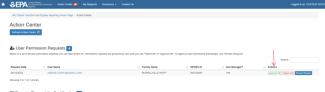
- 2. Click on your Action Center at the top of the NEWSEWEROVERFLOW Homepage
- 3. On the next screen, review the requested permissions under the pending requests tab, and decide on the appropriate action (Approve All, Reject All, or Review Request)
K. How to grant pending access request to a Facility in NETSEWEROVERFLOW via Actions button (user has manage permission
- 1. Sign in to your CDX account and click on NETSEWEROVERFLOW program service to get to the NETSEWEROVERFLOW Homepage (if you do not have the NETSEWEROVERFLOW program service, add it: see the PDF below:
- 2. Find your facility in the “My Facilities” list on your NETSEWEROVERFLOW Homepage
- 3. Select the “Actions” button and then click “Manage User Permissions” from the drop down menu.
- 4. On the next screen, review the requested permissions under the Pending Requests section, and decide on the appropriate Action (Approve All, Reject All, or Review Request)
L. How to Flag a Draft Report via the Actions Button
- 1. Sign in to your CDX account and click on your role for the NETSEWEROVERFLOW program service to get to the NETSEWEROVERFLOW Homepage (if you do not have the NETSEWEROVERFLOW program service, add it: see How to Add the NETSEWEROVERFLOW Program Service to an existing CDX account
- 2. Find your facility in the “My Facilities” list on your NETSEWEROVERFLOW Homepage (if you do not see your facility, add it by following the RIDEM guidance How to Request Access to your RIPDES Permit(s)/NPDES ID(s) in NETSEWEROVERFLOW
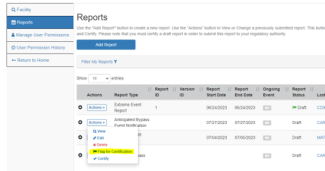
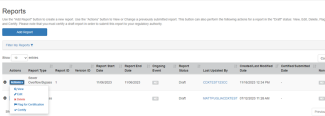
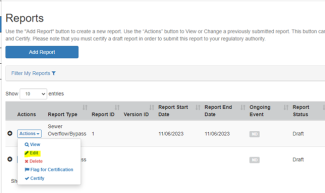
- 3. Select the “Actions” drop-down next to your facility and then select “Manage Reports”

- 4. Select the “Actions” drop-down menu next to the draft Report. If the form is accurate and complete select “Flag for Certification”
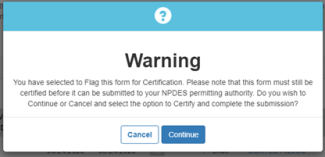
- 5. On the pop-up screen, select “Continue” to flag the draft Report
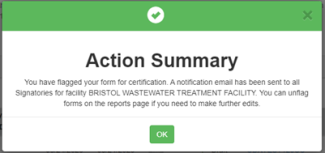
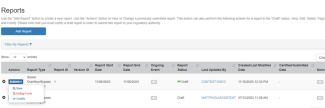
If successful, you will see the following pop-up, and a green flag will be displayed in the report status column

M. Actions Available for Flagged Forms/Unflagging Forms from the Actions Button
- 1. A report that is flagged means that the form contains all of the required fields and is ready for certification by the user with sign permission. If the draft report is flagged, the user with sign permission will see these available actions:
If the draft report is not flagged, the user with sign permission will see these available actions:
If the report is flagged but the user with sign permission sees an error and needs to edit the form, the user can just unflag the report and then edit it (as long as they also have the edit permission for that facility).
To unflag a report and edit it:
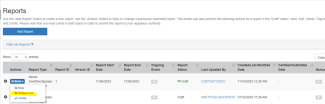
- 1. From the NETSEWEROVERFLOW Homepage, Select the “Actions” drop-down, and then select “Manage Reports” to open the Reports tab
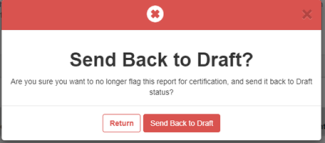
- 2. Select the “Actions” drop-down next to the report you need to edit, and then select “unflag form”
- 3. Click “send back to draft” on the pop-up screen
- 4. Then select the “actions” drop-down next to the report you need to edit again, and click “edit” to open the drafted form
- 5. Update the sections you need to update, and then choose the action you want to perform (i.e. - certify, flag, no action)
NOTE: If the report was instead created in error, the form must be instead be deleted, Please refer to How to Delete a Draft or Flagged Draft (NOI, NEC, NDC, or NOT) that was created in error
N. How to certify a drafted Report via Action Center
- 1. Sign in to your CDX account and click on your role for the NETSEWEROVERFLOW program service to get to the NETSEWEROVERFLOW Homepage (if you do not have the NETSEWEROVERFLOW program service, add it: see the PDF below:
- 2. Find your facility in the “My Facilities” list on your NETSEWEROVERFLOW Homepage (if you do not see your facility, add it by following the RIDEM guidance in the PDF below:
- 3. Select the “Action Center” at the top of the webpage
- 4. Find the Actions column under the section titled “Reports Flagged for Certification”. If the form is accurate and complete, you can select “Certify”:

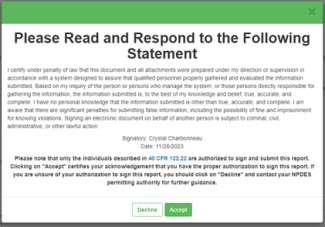
- 5. On the pop-up screen, read the Agreement and click “Accept”
- 6. Go through the electronic signature process by typing in your password, answering a security question, and clicking “Sign”
O. How to certify a drafted Report via Actions Button
- Sign in to your CDX account and click on your role for the NETSEWEROVERFLOW program service to get to the NETSEWEROVERFLOW Homepage (if you do not have the NETSEWEROVERFLOW program service, add it: see the PDF below:
- Find your facility in the “My Facilities” list on your NETSEWEROVERFLOW Homepage (if you do not see your facility, add it by following the RIDEM guidance in the PDF below:
- 3. Select the “Actions” drop-down next to your facility and then select “Manage Reports”
- 4. Select the “Actions” drop-down menu next to the draft Report. If the form is accurate and complete select “Certify”

- 5. On the pop-up screen, read the Agreement and click “Accept”
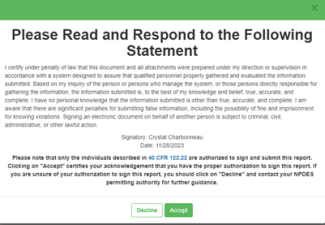
- 6. Go through the electronic signature process by typing in your password, answering a security question, and clicking “Sign”
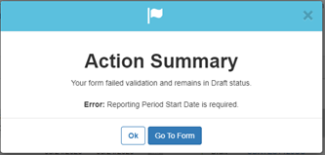
Note: If the form is not complete, you will see a different pop-up screen displaying an error message. You must select “Go to form” in order to open the form and complete the appropriate sections before certifying.
P. How to Delete a Draft or Flagged Draft Report that was created in error
- 1. Sign in to your CDX account and click on your role for the NETSEWEROVERFLOW program service to get to the NETSEWEROVERFLOW Homepage (if you do not have the NETSEWEROVERFLOW program service, add it: see the PDF below:
- 2. Find your facility in the “My Facilities” list on your NETSEWEROVERFLOW Homepage (if you do not see your facility, add it by following the RIDEM guidance below:
- 3. Select the “Actions” drop-down next to your facility and then select “Manage Reports”

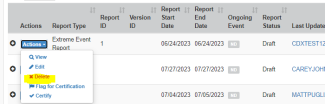
- 4. If the draft form was created in error and you would like to delete the form, select the “Actions” drop-down button next to the draft report you would like to delete. If the report is flagged, you must first unflag the report (see FAQ: Unflagging Forms from the Actions Button).
- 5. Select “Delete”
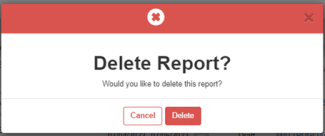
- 6. Review the pop-up module and click Delete to delete the drafted Report, or click Cancel to do nothing.
- 7. Once the Report is successfully deleted, the following pop-up will appear in the lower right-hand corner of the screen. If you deleted a “Change Report” and there were previously submitted versions of the Report, the latest certified Report will be restored on the Reports page. Otherwise, you will no longer see the report listed.
Q. How to Open and Print Reports and/or related attachments in NETSEWEROVERFLOW
- 1. Sign in to your CDX account and click on your role (i.e. – Signatory or Preparer) for the NETSEWEROVERFLOW program service to get to the NETSEWEROVERFLOW Homepage (if you do not have the NETSEWEROVERFLOW program service, add it: see the PDF below:
- 2. Find your facility in the “My Facilities” list on your NETSEWEROVERFLOW Homepage (if you do not see your facility, add it by following the RIDEM guidance below:
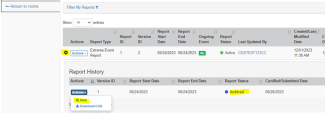
- 3. Select the “Actions” drop-down next to your facility and then select “Manage Reports”
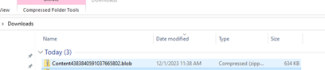
- 4. On the Reports screen, select “Download COR” to download the PDF version of the report and any related attachments. Open the download from the Downloads folder on your computer.

OR
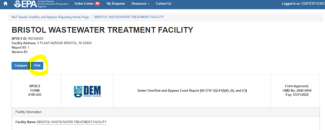
Select the “Actions” button next to the report you would like to print, and select “View”
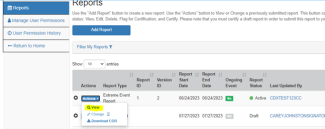
The document can be printed by selecting the Print button above the top left of the document
Note: Archived/previous versions of a report can be accessed for printing by selecting the icon next to the report and then selecting the “Actions” button next to the archived version
R. How to search and export all violations generated for your Facility in NETSEWEROVERFLOW
Coming Soon!
S. How to View NETSEWEROVERFLOW Reports in ECHO
Coming Soon!